Showing posts with label Cooking and recipes. Show all posts

Friday, February 05, 2010

How to Get a Kid to Eat Squash: Squash Scones

Yesterday we had squash scones for breakfast. I had leftover butternut squash and happened across my pumpkin scone recipe. Squash, whole wheat flour and not a lot of sugar make this a delicious tasty way to begin the day. A caution: If you've got, er, discerning children like mine, make sure to call these Pumpkin Scones, as the word "squash" suggests defilement to my particular eaters. The fine young gents devoured these scones.


Delicious "Pumpkin" Whole-Wheat Scones

Preheat oven to 400 degrees.

Mix in a large bowl:
1-1/4 cups all-purpose flour
1 cup whole wheat flour
1/4 cup packed brown sugar
2 tsp. baking powder
1/2 tsp. salt
3/4 tsp. cinnamon
1/4 tsp. all-spice
A pinch of fresh nutmeg

Using a pastry blender, cut in:
1/2 cup (1 stick) chilled butter
Cut in butter pieces until the mixture resembles coarse crumbs.

Optional: Toss into the flour-butter mixture a small handful of dried cherries or cranberries.

In another bowl whisk together:
1 large egg
1/2 to 1-1/2 cup mashed butternut squash, pumpkin or sweet potato
Approximately 1/3 to 1/2 cup buttermilk (or more)

Note: The buttermilk is approximate because it depends on the amount and consistency of your vegetable. Fresh pumpkin has a very different consistency than canned pumpkin, squash has a lot less moisture than pumpkin, and sweet potatoes have a different texture, and so on.

Add wet ingredients to flour mixture and stir until flour mixture is just moist and can be patted into a ball. If your dough is too dry to make a ball, add a splash more buttermilk until the flour is just moistened and can be molded into a ball.

Turn out your dough onto a floured surface and knead gently until mostly smooth. Pat into a circle about 1 inch thick. Cut into 8 wedges and place wedges on an ungreased baking sheet. If desired, brush scone tops with milk and sprinkle each scone lightly with a pinch of sugar. Bake for 15 minutes or until golden-brown.

Mmmmmmmmmmmmmmmm. Squashy yummy golden goodness.

Wednesday, December 30, 2009

Pumpkin Buttermilk Pancakes: Edited

Fine young gent requested pumpkin pancakes for his birthday breakfast and even helped make them. He's decided that he wants to be a cook when he grows up. These buttermilk pumpkin pancakes are a lovely rich orangey color, with a mellow pumpkin flavor and they're not too sweet, perfect with just a little maple syrup on top.

Note (12/30/09): I'm changing the recipe. Want pumpkin pancakes that are even better? Add 1/3 c. sour cream for pancakes that are even fluffier and more flavorful.

Buttermilk Pumpkin Pancakes

Heat your griddle to about 350 degrees.

Mix in a large bowl:
3 cups flour
4 Tablespoons brown sugar
1-1/2 teaspoons baking powder
3/4 teaspoon baking soda
1 1/2 teaspoon ground allspice
1 1/2 teaspoon ground cinnamon
3/4 teaspoon ground ginger
1 teaspoon salt

Mix in a smaller bowl:
2+ cups buttermilk
1 1/2 cup pumpkin puree (directions for making fresh pumpkin puree here)
1/3 c. sour cream
2 eggs (For fluffier pancakes separate the eggs, mix in the yolks now and set aside the whites in a small dish)
3 Tablespoons melted butter

If you've set aside the egg whites to make fluffier pancakes, beat the whites until they're nice and fluffy but not stiff. You can use a stand or hand mixer, but with two egg whites it's almost as easy to beat them by hand in a small bowl with a whisk.

Add the wet ingredients to the dry ingredients, stirring until just mixed. Particularly if you're using fresh pumpkin, the thickness of your pancake batter will vary. Add more buttermilk or milk until your batter is of the desired consistency. If you've set aside and beaten the egg whites, fold them gently into the batter. Let sit for 5-10 minutes before pouring your pancakes.

Pour the batter onto the griddle, about 1/4 to 1/3 cup per pancake, depending on how large you'd like your pancakes. Brown on both sides. Serve with maple syrup. This recipe makes about 2 dozen pancakes, giving my family of seven enough for breakfast with a few pancakes left over for lunch or the freezer.


Still have pumpkin to use? I'll post my pumpkin oatmeal scone recipe soon, and fine young gent and I are are planning on trying out a pumpkin gingerbread recipe this week so we'll let you know if it's delicious.

Or try this pumpkin bread/muffin recipe from The Fresh Loaf. It is to die for. We made nearly two dozen muffins, some with mini chocolate chips and some without, and they were all gone by the end of the afternoon.

Thursday, June 04, 2009

On the table

Dinner Menu

Fritattas, made with eggs from our own hens and my sister's:
--Baby beets, fresh onions and spinach, all from the garden
--Fresh onion from the garden, diced bacon, broccoli and tomato from the Farmer's Market

Beet greens from the garden and Swiss chard from the Farmer's Market, sauteed and steamed with fresh onion from the garden

Homemade honey whole wheat bread, made with honey purchased from a friend, served with butter and homemade strawberry jam

Strawberry-rhubarb pie, made with strawberries from the front yard and rhubarb from the neighbor
---------------------------
We're making the move. We avoid processed foods. Eat more fresh fruits and vegetables. We serve oatmeal instead of breakfast cereal. We're growing, picking and preserving our own food. Eating seasonally. More local foods, grown by and purchased from people in and near our community, and we're participating in Community-Supported Agriculture. We drink locally-roasted coffee instead of Peet's. Our diet is continually evolving. Ten years ago, we ate a lot of pasta and potatoes, out-of-season vegetables, store jam with all of its preservatives. We didn't read labels looking for foods without high fructose corn syrup. We didn't eat a lot of salad, not a lot of green food at all, actually.

There's got to be a balance, and we haven't dived in headfirst. We can't grow our own rice and wheat in the back yard, nor do we have any desire to do so. We love bananas and eat broccoli and salad year-round, and though we purchase less than we used to, these foods are still staples in our home. That may change as our diet continues to evolve, as the children get older and more tolerant of green food and things that taste different, and as we educate ourselves on the pleasures of eating seasonally.

When I look at last night's menu, though, turning into a "locavore" isn't really what I'm thinking of. I'm delighted by good food. I'm grateful that we have the means to serve simple delicious meals to our children. And I feel a sense of connection to my meal, satisfaction that I know where a lot of that food came from: I can look out the window at my garden and at my hens scratching in the dirt. (Around my peas!! Ack! SHOO!) My children planted seeds in the dirt and saw them end up on our table as greens. Ten minutes before I sauteed a fresh onion, it was in the ground. Some of our vegetables were bought from the people who had just harvested them from their own gardens that morning. On Wednesdays, my house smells like fresh bread. We met a new neighbor who gave us rhubarb for free simply because he had enough to give away. My children play with the children of the family who sold us our honey, and I know that the chickens that lay the extra eggs we buy live in a large and clean pen. Our scraps and discarded stalks and rinds will turn into rich soil in which to grow more food for our table.

Life is good. Food is good.

Friday, November 14, 2008

Pumpkin: From seed to pie

Over the river and through the woods. It's that time of year, so I'm bumping up this pumpkin post from last year.

As long as we're talking pumpkin pie, if you're planning on coming to my house for Thanksgiving this year (2008), just show up sometime around noon and bring what you brought last year. That will save us all a bunch of phone calls. It's not like I want to talk to you people ahead of time. If you didn't come last year and you want to, call me. The more the merrier. Or just show up, unless you're some creepy internet stalker stranger. If you're a creepy internet stalker and you do show up, you'll have to do the dishes and serve the pie.

Pumpkin: From Seed to Pie


"Fresh pumpkin is so difficult to use that few modern cooks go down this road." (The New Best Recipe, by the editors of Cook's Illustrated Magazine, p. 903)

I'm crunching the last of our crispy salty pumpkins seeds as I type. Tuesday we scooped the seeds out of our little pie pumpkins, Wednesday we roasted seeds and baked and pureed pumpkin, and by yesterday's Thanksgiving feast, the tiny pie pumpkins were creamy pumpkin pies.

Wednesday evening I was making pumpkin pies, stirring the pumpkin in a pan on the stove, and I wondered idly aloud, "Why do I have to stir the filling until it's glossy? What purpose does this step serve?" One of my favorite things about The New Best Recipe is the blurb before the actual recipe explaining why the recipe works, and Mom was there to read to me while I stirred. Well, first she read the above sentence to me, the one about modern cooks not using that difficult fresh pumpkin. Then she found the part about the stovetop stirring. Here's why you're supposed to cook the pumpkin and spices ahead of time (from the same page of the cookbook): "You can freshen the taste of canned pumpkin by cooking it with the sugar and spices before combining it with the custard ingredients. As the pumpkin simmers, you can actually smell the unwelcome canned odor give way to the sweet scent of fresh squash."

Umm...yum?

I still wouldn't skip this step when using fresh pumpkin. Combining the pumpkin, brown sugar and pie spices then cooking them for a few minutes on the stove while your pie crust is prebaking deepens the flavor of the fresh pumpkin, giving you rich dark orangey deliciousness. Then stir in the cream and the eggs and pour into a hot partially-baked pie crust for a creamy-custardy filling in a crust that stays crispy instead of getting mushy.

And the second thing I'd say is...really? Honestly, I was a little taken aback by the idea of fresh pumpkin being difficult. Preparing fresh pumpkin is almost as easy as baking and mashing a potato, and it's delicious.


From Seed to Pie: Fresh Pumpkin

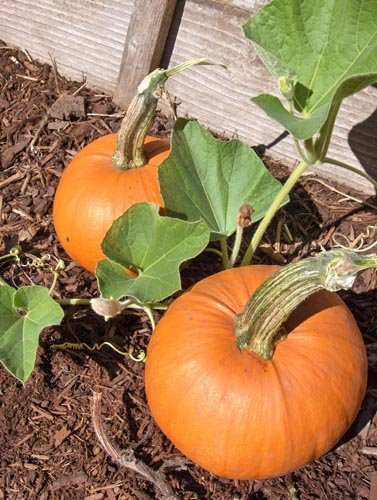
Growing the Pumpkin: For best results, you really can't just cook any old pumpkin. Even pumpkins labeled "pie pumpkins" at the grocery store aren't necessarily sweet sugar pumpkins, though they are still much tastier than the larger jack-o-lantern pumpkins you'll find at the pumpkin patch that are perfect for carving. You can also substitute a sweet winter squash, like acorn squash, for a perfectly lovely "pumpkin" pie. If you're growing your own pumpkins, look for pumpkin seeds labeled "sugar pumpkin." They will typically be much smaller than jack-o-lantern pumpkins, but because they're intended for eating, they're selected for flavor and sweetness rather than size and decorativeness.

I'm not even close to being a Master Gardener, but I'll tell you how I grow pumpkins. I'd suggest doing a little more thorough reading elsewhere if you've never grown anything before in your life. I buy my seeds, plant them in one end of one of my garden boxes, and check them every few days to see if they've sprouted. If they haven't sprouted or something has munched them, I plant a few more seeds. I pull weeds once in a while. When I get around to it in the fall, around the time it starts getting cold but before it frosts, I pick the pumpkins and put them in the cool but dry garage until I'm ready to use them. Pumpkins are perfect for the lackadaisical gardener because that's pretty much it, and I always have enough pumpkin for Thanksgiving pies and more. (Yearning for better directions? More than you ever wanted to know about growing pumpkins at Pumpkin Nook.)

(Cooking directions cut and pasted and slightly modified from an August '06 Poohsticks post, What's That Squash?)

How to get from pie pumpkin to pumpkin puree: Heat your oven to 400 degrees. Halve your pumpkin(s) and take out the seeds and slimy bits. Set the seeds aside for roasting later. Brush the cut edges of the pumpkin with a bit of oil and place on a rimmed baking sheet with the cut side down. Bake for about 40 minutes (for small pumpkins) to 1 hour (for larger). When done the flesh of the pumpkin should be soft when pierced with a fork, and the outer shell should be pulling away from the flesh. Let cool until you can handle it without burning yourself, then peel the shell off of the pumpkin. Puree the pumpkin flesh in the food processor.

Using your puree: You can serve the puree as is with a little butter and brown sugar, as though it's mashed/pureed squash (because it is). If you would like to use your puree in your favorite recipes for pie, scones (my favorite!) or pumpkin bread, let it cool then put it in the fridge for a few hours, or even overnight, if you can. Some of the liquid will separate from the puree, allowing you to skim it away so that your puree is just a bit thicker.

I disagree with The New Best Recipe contention that fresh pumpkin is difficult to work with; however, the moisture content is difficult to predict. Particularly when making baked goods, you may need to adjust recipe ingredients slightly to compensate for the fact that fresh pumpkin is a little more liquid than the thicker canned pumpkin, but that's a fairly simple adjustment. I usually cut back on the liquid and/or add a little more flour, depending on the recipe. You can call it by...well, by eye rather than by ear, I guess, if you're familiar with the basic consistency of muffin or pancake batter or whatever you're making. Taking the time to experiment and get comfortable cooking with fresh pumpkin is worth the payoff, because it is delicious!

Sunday, October 12, 2008

Roasted Beets, Leeks and Onions

Roasted Beets, Leeks and Onions

You need:

Olive oil
2 beets, peeled and cut into cubes
2 onions, peeled and cut into large chunks
2 leeks, cleaned and sliced (How to Clean Leeks)
Several cloves of garlic, peeled
Salt and fresh-ground pepper (optional)
Balsamic vinegar, about 4 Tablespoons

Toasted pine nuts or chopped toasted pecans, goat cheese, or save the salt and pepper for the table (optional)

Heat oven to 425 degrees.

Heat a large ovenproof pot over medium heat. Add olive oil, then add the beets, onions, leeks, and garlic, and if you've got a few shallots left over from last time loving husband made a recipe calling for shallots, throw those in too. Wonder to yourself why he can't add two tiny little leeks more than the recipe calls for. Cook, stirring, until vegetables have browned a little. Toss with the balsamic vinegar and a little salt and pepper.

Place the pot of vegetables in the oven. Bake at 425 for 15 minutes, then lower the oven temperature to 375 degrees and continue cooking for 30-40 minutes until beets are tender. Serve topped with the pine nuts or goat cheese or alone with salt and pepper.

Based on this recipe from BBC Good Food.

Tuesday, July 22, 2008

Tuesday Ten: Just a Bowl of Cherries

We have become friends with a new family, people we met at the park through a mutual friend. New Friend has a cherry tree, and invited us over to pick sour cherries. (Here's a really cool thing: My favorite cookbook says that sour cherries simply aren't available, except in Michigan, the Pacific Northwest, and pockets of New England. I am so lucky.) Lovely Lady the Elder gamely climbed a ladder and risked getting poked in the eye by a stick or falling off a ladder to help pick cherries. Not only that, but she accompanied us on what was really a playday for the gents without complaining once. She's a good egg.

I love cherries. Cherry trees are beautiful, and fresh-off-the-tree cherries are fabulous. I promised my kids a cherry pie, and we picked a rather large bucket of cherries. I glowed when I brought them home, revelling in my bounty.

Until I had to pit them. All of them. Is there a job more tedious than pitting cherries? I took them out into the back yard and pitted for what seemed like hours.

Tuesday Ten: Yesterday's Ten Random Thoughts While Pitting Cherries

1. "Life is just a bowl of cherries...."
You know me by now. Might as well get the song out of the way right from the start. Not a bad message, though. Leave it to me to turn an earworm into a life-affirming message, right? But seriously....

Life is just a bowl of cherries.
Don't take it serious; life's so mysterious.

and

The sweet things in life, to you were just loaned
So how can you lose what you've never owned?

and

Life is just a bowl of cherries,
So live and laugh at it all.

I don't need to add another word.

2. "Thank you, bunny, I'd love help." (Thinking: "GAH!!")
The fine young gents are fascinated by the cherry pitter. We have one cherry pitter. The Mom dilemma: Do I chirp "Sure you can help, sweetheart!" and grit my teeth as the helper sloooooooowly pits the cherries and drops them in the grass and feeds them to the dog? Or do I say no and crush any hopes of raising helpful young gents?

3. Someone needs to weed the garden.
I've had that thought several times the past couple weeks. It works really well. Try it and see how fast the garden gets weeded. Heh.

Once the weather finally warmed up, the garden took off, and so did the weeds. Problem was, we took off too--to the park, to the pool, to visit friends. We just haven't been home, and while I'd kept up with the worst of the garden bed weeding, by this week there was a veritable carpet of dandelions and grass and mallow and those ones with the funny flat leaves between the boxes. So I'm sitting in the yard endlessly pitting cherries, looking at the weedy garden, thinking "Someone needs to weed the garden." The problem is that once it gets that bad, it seems like an overwhelming job, so I avoid tackling it. That works really well too.

Today I weeded the garden, by the way. It was cool and sprinkling for much of the day, perfect for garden work. I thought about taking a picture of the weed pile and posting that too, but I didn't want to run in for the camera. Not really. That's a lie. I run in for the camera to take pictures of my feet, and the weed pile is sure a lot more interesting than my long toe. But there's such a thing as keeping it too real. I don't want to destroy my, er,...your fantasies of me as a gardener extraordinaire.

As a matter of fact, let's just pretend I haven't said a word about those weeds. My garden is immaculate. No, really. My house too, while we're at it.

4. Whose idea was it to pick so many %$&*^$%& cherries?

5. Cherry pie? Cherry cobbler? Cherry pie? Cherry cobbler?
Loving husband makes the pie crust in this family. Loving husband was in California, and refused to come home to make pie crust. Even though I said I was making fresh cherry pie, and cherries are only in season this time of year. So I was stuck pondering the dilemma: Make a pie, or take the easy way out? Ooooo. Or what about cherry crumble? Crumble topping is even easier than biscuits for cobbler. What to do?

6. Praise.
Sitting in the back yard on a warm summer afternoon while the kids play in the sprinkler, after a lovely morning of swim lessons and visiting with friends.....life is good. My heart was full. We live a blessed life in this wonderful world. I was content.

7. Well, sort of, because my next thought was.....

8. Whose idea was it to pick so many %$&*^$%& cherries?

9. I wonder if I should try drying these?
I did and they were fabulous.

10. This had better be worth it.
It was. We have canned pie filling for fine young pie-loving gent's November birthday pie, ate a spinach and pine nut salad with dried cherries for dinner this evening, and stored a small jar of dried cherries in the pantry.

As you can see, I made a pie. It was lovely, a beautiful pie. I made a beautiful pie. (Don't tell loving husband, or he'll expect me to make my own pie crust all the time.) I carved little cherry-shaped steam vents in the top, and they actually looked like cherries--with the little leaf at the top of the stem, even--after the pie was baked. We ate cherry pie with lunch today, and it was perfect.

Mmmmmmmm...............cherry pie. Warm cherry pie. Warm cherry pie with just a tiny scoop of vanilla ice cream on top.

Gotta go.

Saturday, July 19, 2008

Blueberry Cobbler

It's that time of year again. I've been out in the berry patch, and my babies are still growing, and I am oh, so so grateful for this good life. (Originally posted August 2006)

We went blueberry picking this morning. The sun was shining, the blueberries were plump and sweet, and the fine young gents were happy. It was quiet except for the hum of contented conversations up and down the rows and the occasional plane overhead. "Oook! Oook!" shouted the youngest gent each time he saw an airplane. The older boys ran up and down the rows of berries while the baby helped me by dumping my blueberries into the big bucket and feeding me green blueberries. We saw an empty bee nest and a grasshopper. It was perfect.

Berries to freeze when we got home, strawberries from the farmer's market and blueberries from our outing. I picked through the blueberries to take out the stems and leaves and spiders. Now I've got a freezer full of berries for smoothies and pancakes and ice cream topping. A bit of sweet summer to brighten our winters.

I didn't freeze them all, as you can see. I tossed some berries in a bowl with some sugar, cornstarch, lemon juice, dash of cinnamon and salt. I even had a few blackberries left to throw into the berry mix. A cobbler tip (recipe below): Cook the berry mixture first until the berries are bubbling hot. Plop the biscuit mix on top of the hot berries, raise the temp in the oven, and cook until the biscuits are brown on top. The berries get perfectly done and the biscuits are moist inside and crisp on the outside.

On the way back from the blueberry farm, my husband and I talked about choosing perfect days. Of course the berry field wasn't perfect in the sense that there were no flaws, or that every single thing was pleasant. The grass was itchy and made me break out in a rash. There were spiders, the baby kept getting in the way or trying to wander off, and the other young gents ate too many berries and cried when they fell down. I can't pretend the annoying stuff doesn't exist, as though I am a child plugging my ears and singing "Lalalalalala." The day is the same day, itchy grass and warm sun together. But when I come home I pick through the day to discard the stems and leaves and spiders, the itchy grass and little fusses of the day, and think instead about the sunny berry field and watching the planes and playing with my boys. I've finally realized that the stories that we tell about our lives help to define and create the lives we lead. I get to choose the parts of the story I want to make most real. When I retell the story of my day to myself,I can choose to let petty things go. I choose wonderful.

I didn't always know how to do that, how to let go of all of the little fusses. I nursed grudges and clung to grievances and complained about the itchy grass in my life. I still do, I'm not perfect. To be fair, thinking about the itchy grass in our lives can be useful: Next time I go berry picking I'll wear long pants or bring a blanket. And we can't live in the "perfect" every day. The days where the cat throws up and the gents fight and the lovely ladies burst into tears when I say "Good morning" and my husband grumps and I feel like I've yelled all day long. Not perfect. Flat tires and broken windows and dysfunctional relatives (um, not you guys, just those other relatives...yeah, the ones that don't read this blog...) and flooded toilets and stupid arguments happen, and far be it from me to tell anyone, myself included, "It's all good." But why did it take me so long to realize that I can't let those things take over the stories of my life?

Just lately I've realized how quickly the time flies by. The baby I rocked yesterday is tall and beautiful, dancing her way out of girlhood. Tomorrow I'll be rocking my grandbabies thinking "Where did my life go?" I wish I'd learned sooner to choose happiness over regrets, and to choose contentment over resentment. Today I will choose to remember the blueberries and sunshine. I will give the people I value the grace and love they deserve instead of grumping about their faults, and I will extend that grace to myself. I will treasure the wonderful moments of my life and theirs so that when I rock the babies of my babies my stories will be of picking blueberries and running through the sprinkler and reading good books and laughing in the hammock.

A little vanilla ice cream on top....Mmmmmmmmmmmmmm.

Some things are perfect.


Perfect Berry Cobbler

(Adapted from The New Best Recipe from the Editors of Cook's Illustrated)

Preheat the oven to 375 degrees.

In a large bowl gently mix:

6-8 cups fresh berries

1/2 cup sugar

1 tablespoon cornstarch

Zest and juice from 1/2 lemon

Sprinkle of cinnamon and dash of salt

Pour the mixture into a square baking dish or a glass pie pan. (For a larger cobbler, double the recipe and use a deep 9x13 dish.) Put the dish onto a rimmed cookie sheet to catch drips, and put it in the oven for 20-25 minutes, until the berries are hot and bubbling.

While the berries are baking, mix the biscuits. Whisk dry ingredients in one bowl:

1 cup flour

1/4 cup sugar

2 teaspoons baking powder

1/4 teaspoon baking soda

1/4 teaspoon salt

.....And in a smaller bowl mix:

1/2 stick (4 tablespoons) melted butter

1/3 cup buttermilk (I set aside an extra bit for when I mix the biscuits together, as sometimes I need an extra tiny splash.)

1/2 teaspoon vanilla

When the berries are bubbly, mix the wet and dry biscuit ingredients, then take the berries out of the oven and drop spoonfuls of biscuit onto the hot berries. Turn up the oven temperature to 425 degrees, return the cobbler to the oven and bake until the biscuits are golden-brown, about 15+ minutes.

Serve warm with vanilla ice cream on top.

Saturday, June 14, 2008

Eat Beets

An article about cooking beets, including delicious-sounding recipes:
http://www.thegreenguide.com/doc/106/beets

Some excerpts:

"...beets along with prickly pears make up the only edible sources of the valuable family of pigments called betalains. Current research is discovering the ability of these pigments to act as powerful antioxidants, helping in the fight against the damage caused by free radicals. Beets also provide potassium, vitamins A and C, magnesium, riboflavin, iron, copper, calcium and zinc."

"If you purchase beets with the greens attached, it is best to cut them off as you as you get them home, and serve the greens within a few days. They are similar in flavor to Swiss chard and can be sautéed with garlic and olive oil. The beets themselves can be stored in the refrigerator loosely wrapped for a few weeks."

and

"Beets can be eaten raw, steamed, boiled, juiced or roasted, but no matter how you eat them, they are a delicious and healthy addition to your diet."
--------------------
Added later: Who knew??? I rubbed the beets with a little olive oil, wrapped them in foil, and roasted them according to the directions in the article linked above. I tasted the beets plain so I could get a sense of the flavor.

Yum. Just....yum.

Delicious and easy. I peeled and sliced them, tossed them with a little salt and pepper, and Voila! Beets for dinner.

Now to convince the kids that they really hate beets so that I can have them all to myself.

Wednesday, June 11, 2008

CSA box--June 11

We picked up our first CSA box this afternoon:
Lettuce, a bag of spinach, a bag of salad mix, carrots, radishes, bok choy, cilantro, peas, beets and a little box of strawberries.

Loving husband is looking forward to cooking the bok choy. He's already got something in mind.

I am stuck with the beets.

shudder

I have to learn to cook beets. I hated beets when I was a kid, except for pickled beets, probably because once they're pickled they no longer taste like beets. Beet-lovers assure me that beets are delicious. We're about to find out.

----------------------------------
Adding later:
We ate bok choy for dinner. It was delicious.

We had fresh green salad too, with radishes for the top. Yum.

I made a carrot-radish relish (recipe here), which used the rest of the radishes, some of the carrots, and a little of the cilantro. It was all right.

My own spinach is coming on strong in the garden, so the CSA spinach has been frozen for future use in quiches, omelets, and soups.

The fine young gents are in their tent in the back yard shelling and eating the peas. They had their eyes on the strawberries too, but I told them hands off, the berries are for breakfast.

We still have the beets. I was kind of hoping that while my back was turned, someone would sneak into my kitchen and whip up a tasty shredded beet-and-carrot salad, or some roasted beets with caramelized something. No such luck.

Sunday, June 08, 2008

Fruits of our labors

This evening we ate a spinach salad with strawberries and toasted hazelnuts, all from our very own yard.
------------------------
Yesterday I thinned the spinach and salad greens again, and came away with a bowl full of greens. The front yard strawberries are ripening. We ate a bowlful of fresh strawberries with breakfast this morning, and I picked another large handful for the salad this afternoon. Last fall, loving husband raked up the hazelnuts from the filbert tree in the back yard and shelled a bucketful, so there are hazelnuts in the pantry for toasting.

Spinach and strawberry salad
Put clean fresh spinach in a bowl.
Toss with sliced strawberries and toasted hazelnuts.
Serve with a balsamic vinagrette.
Delicious!
(If you've got a goat, or even if you don't, a little goat cheese makes the salad even more perfect. But alas, we've not got a goat, nor had we any goat cheese. And I didn't want to go to the store, so we went without.)

Thursday, November 29, 2007

Pumpkin Gingerbread

Shhhhh, Don't tell cheesecake. I've got an even greater love. Cheesecake is perfect, dreamy and smooth and sweet. But when I go to Dana's Cheesecake at the Saturday Market I order, not creamy cheesecake, but dark spicy gingerbread.

My fine young cook and I pureed a giant bowl of pumpkin last week. What to do? Pumpkin gingerbread? I wonder if there is such a thing?

Ooooooooooo. That sounded delightful. So we got to work. I found a recipe that was close to what we were looking for (here) and we modified it to suit our purposes. Cooking with a just-turned-seven-year-old is delightful too. Sevens are curious, capable, and good company in the kitchen. Old enough to measure and stir, inquisitive enough to put up with a fractions lesson, and chatty enough to carry on a decent conversation about God or space ships or burps or worms or why people die.
And just think.....if he's a good assistant now, how long until we can turn over the apron and the whisk and just enjoy the smell of cookies wafting from the kitchen while we sip tea and read our favorite books?

The gingerbread was delightful. Warm from the oven with a dollop of fresh whipped cream, the mild moist pumpkin flavor mellowing the dark molasses and bright ginger.....oh. Heavenly. I could eat this every day.


Pumpkin Gingerbread

Preheat oven to 350 degrees. Grease the bottom and sides of a square baking dish.

Mix in a large bowl:

2 cups flour
1/2 cup brown sugar
2 teaspoons baking powder
1 teaspoon baking soda
1 teaspoon cinnamon
2 teaspoons powdered ginger

Mix in a smaller bowl:

1 cup pumpkin (fresh or canned)
1/2 cup molasses
2 eggs
1/3 cup melted butter
1/4 cup milk

Pour the wet ingredients into the dry ingredients and stir until just mixed. Pour into the greased baking dish and bake for 40-50 minutes. Let cool in the pan on a wire cooling rack. Most delicious when served still warm with lightly sweetened whipped cream on top.

Monday, September 03, 2007

Blackberry Days

Summer's last hurrah, blackberries. We went blackberry picking last night, up on the hill at the ranch with my Busy Farm sis and some of the cousins. Lovely lady and I picked two huge bowls of blackberries. By now they've been turned into blackberry-peach crisp, several jars of jam, or bagged and frozen for smoothies.

There's something about picking blackberries. Maybe it's because we grew up eating the blackberries at the edges of the field on the farm where we grew up. Mom always knew we'd been eating blackberries when we came in with purple hands and mouths. Blackberries rank up there with shelling peas and the smell of fresh hay when it comes to plunking me firmly back into my childhood.

Maybe it's the effort it takes to pick them. We always come home scratched and dirty, a bit apprehensive about poison oak, vowing to wear long sleeves and pants next year.

Maybe it's because they're free. The fruits of my labors (heh heh), not counting the crisp which I would have made with the peaches anyway: Seven jars of jam plus four bags of freezer berries cost me a grand total of $4, if you total the costs of the sugar, pectin, and freezer bags.

Maybe it's because blackberries signal the end of summer. Not the calendar end of summer, but our yearly blackberry expedition signals that fall is approaching, that school will start soon, that summer fruits are nearing the end and we'll have to settle for frozen, canned, jammed until sweet strawberries return in June.

Perfectly Peachy Blackberry Crisp
Or peach crisp, if you have no desire to risk poison oak and get scratched to bits just for the perfect dessert. Or blackberry crisp if you haven't got any peaches handy. Really, you can't go wrong.

Topping
Heat the oven to 375. Spread 2 cups oats evenly on a large baking sheet and toast them in the oven for 7-10 minutes. They're ready when they smell fragrant and oaty. This dries the oats slightly and gives them a nice nutty flavor. Let cool.

In a medium bowl, stir together:
3/4 cup flour
1/2 cup packed brown sugar
1/2 cup sugar
1/2 teaspoon cinnamon
1/2 teaspoon nutmeg, fresh if you've got it
1/2 teaspoon salt

Then add:
10 Tablespoons chilled butter (unsalted if it's handy, otherwise use salted), cut into 1/2" pieces then cut into the flour mixture using a pastry blender (like this one). You can also use your food processor to mix the flour mixture and cut in the butter. The pastry cutter is easier to assemble and clean though, so it's worth the little bit of elbow grease it takes to use it.

Mix in:
The 2 cups toasted oats

Place the entire mixture into the refrigerator to chill while you assemble the filling.

Filling
To skin peaches easily, boil some water in a large pot. Once it's boiling, drop the peaches in for about 30 seconds (more if the peaches aren't very ripe), then remove with a slotted spoon and place into a bowl of ice water. The skins should be loose enough that you can pull them right off the peaches. I started with the peaches, peeled and sliced, then added enough blackberries so that I had 12 cups of fruit total.

In a large bowl gently mix:
12 cups fruit, blackberries and sliced peaches
1 cup sugar
2 tablespoons cornstarch
Zest and juice from 1 lemon or lime (lime with blackberries alone is perfect, with peaches I stick with lemon)
Sprinkle of cinnamon and dash of salt

Pour the fruit mixture into a deep 9x13 dish. (If you're halving the recipe, use a square baking dish.) Sprinkle the chilled topping evenly over the fruit. Bake at 375 for 40-45 minutes, until the fruit is bubbly and the topping is golden-brown.

It tastes even better when you've got good company, so invite the neighbors over. Serve warm with a little vanilla ice cream. Peachy keen.

Saturday, August 04, 2007

How to Make Excellent Chicken Soup....

...Or, Know Where Your Food Comes From

For a fresh chicken

1. Get up at 5 a.m. Or 5:15. Or hit the snooze until 5:30, which leaves no time for a shower. It's okay not to take a shower. You'll see why in a minute.

2. Drive around looking for coffee. Can you believe it? I couldn't find a single coffee place open at 6 a.m. on Saturday morning. All of the coffee drinkers must be lazy slug-a-beds on Saturday mornings. I wouldn't know, since I'm usually asleep at this hour. Finally I happened upon Cal's Donuts, which doesn't officially open until 7 a.m., but the OPEN sign was lit and the coffee was ready. I got two donuts by mistake-- I meant to say a coffee and a buttermilk donut. My mouth said "Two coffees. No, two donuts. I only need one coffee." Rather than fuddle the old guy any more by changing my mind again, I just paid for the extra donut. Clearly I needed the coffee. Maybe I should have gotten two coffees after all.

3. Drive to the farm and spend the next six hours or so up to your elbows in chicken guts. This is why not to bother with the shower. You're just going to get bloody (and worse) anyway, so why waste your time? A helpful hint: Eat your donut as you drive. Even for the non-squeamish the sight of an upside-down chicken dripping blood into a tub can put you off your tasty donut.

Last week, in a rare moment of kindness, I offered to help my sister butcher her chickens. It's a hard job and no one else in her family will actually gut the chickens. I'm not squeamish and I like my sister, so along with her husband and the oldest kids (I guess they all like her too), I helped butcher chickens this morning. They cut off the heads and feet, and we...er, eviscerated them. "Eviscerated" sounds so much better than "pulled the guts out," don't you think?

It takes a lot of work to get chickens from this:

To this:

To this:
(Don't worry, even though that's Hattie-the-chicken's photo above, and though I've often threatened to make Ethel-and-dumplings for dinner, my own feathered friends are safe and sound. For now.)

4. Come home with chickens that look a heck of a lot more like something you'd find wrapped in plastic at the grocery store than they did just a few hours ago when they were clucking around, or when you were trimming off the scent gland or chopping off the feet or eviscerating them.

5. Pop a chicken in the pot. Wash it and put it in a large pot, toss your favorite broth fixin's in with the chicken, and turn up the heat. Less than six hours from clucking and squawking to the pot. It doesn't get much fresher than this.

6. Take a quick shower. Don't look in the mirror, and try not to think about what might be on your face. But wash your hair twice just in case. By the time you're done with your shower the pot should be boiling and you're well on the way to Delicious Chicken Soup.


Delicious Chicken Soup

For the broth, you need....

A whole fresh chicken (A grocery store chicken will do if you're sqeamish or don't know a chicken farmer)
Onions
Celery
Carrots
Salt
Optional: Apples, white wine, peppercorns, whole cloves

Pop a whole chicken in a large pot, including the neck. I cut up the chicken, just so that it will fit, but it's not necessary. Throw in some carrots, a quartered onion or two (peel and all), celery stalks (the ends or those pale center pieces will do just fine), a bay leaf, a couple apples (also quartered) and about half a cup of white wine if you've got some handy. Add a little salt if desired. Put a few whole cloves, whole peppercorns, and a sprinkle of oregano and basil into a tea ball and drop that in too. Add water until everything in the pot is just covered. Bring the whole thing to a boil, then reduce the heat to bring it down to a nice simmer.

After about 30-40 minutes of simmering, remove the chicken from the pot. Leave the neck in and leave the pot simmering on the stove. Let the chicken cool until you can handle it and pull the meat off the bones. (I'm always in a hurry, so I use tongs to pull off the meat while it's still hot.) Chop the cooked meat and save it in the fridge, then toss the bones back in the pot. Let the pot simmer on the stove for another hour or two, until you've got time to put a strainer or sieve on a large bowl and strain the veggies and such out of the broth.

Allow the broth to cool for about 20 minutes, then use a paper towel or a fat skimmer to get the grease off the top. If you don't need the broth right away, cover the bowl of broth and put it in the fridge until tomorrow-- you can easily skim the hardened fat right off the top. If you want clearer reduced chicken broth, strain the broth a few times through several layers of cheesecloth and boil it until it's reduced. I don't bother because the unfancy way looks kind of murky, but it only takes ten minutes to prepare, ten minutes to pull the meat off the bones, and a few miscellaneous minutes to strain it, then I put the broth in the fridge and clean up. It takes some cooking time, but for most of that time the broth is just simmering away while I do laundry or chat on the phone or watch mindless television.

(If the broth recipe seems familiar, it's because it's the one I use when I make Delicious Chicken Pie.)

From broth to soup....You need:

Chicken broth (Homemade or ~gasp!~ from the store)
2 carrots, diced
2 stalks celery, diced
1-2 onions, chopped
Bay leaf
Salt and pepper, to taste
Noodles (uncooked) or cooked rice
Diced cooked chicken
Parsley, chopped (optional)

Place your broth in a large soup pot over medium heat. Add the carrots, potatoes, celery and bay leaf. (You may have to adjust the amounts of vegetables according to the amount of chicken broth you're using.) Simmer until the veggies are tender, about 15 minutes. If you're using noodles, bring it to a boil, add the noodles and cook until tender. Add the chopped chicken and simmer until the chicken is heated through. If you're using rice (we usually have leftover rice in the fridge), add the rice and chicken at the same time and simmer until heated. Add the parsley if you like parsley, and salt and pepper to taste.

Serve with a green salad and homemade buttermilk biscuits.

Delicious.

Saturday, June 16, 2007

Jam Tomorrow and Jam Yesterday

"You couldn't have it if you did want it," the Queen said. "The rule is jam tomorrow and jam yesterday - but never jam today." "It must come sometimes to jam today," Alice objected. "No it can't," said the Queen. "It's jam every other day: today isn't any other day, you know."
- Lewis Carroll, Through the Looking Glass

Yesterday we celebrated the last day of school with a trip to the strawberry patch. We left youngest gent home with dad, packed water bottles and sunscreen, and off we went. It was a delightfully warm sunny day. The strawberries were perfect-- warm and sweet. As we picked, the lovely ladies sang in lovely harmonies. We stopped to watch the hawks circling overhead, and examined the strawberry runners creeping out into the spaces between the rows.

I observed with a grin as the ladies and gents picked strawberries each in his or her own unique way, perfectly expressing his or her own unique way of moving through life:
Elder lovely lady dreamily picking through the strawberries at a snail's pace, trying to be conscientious and having absolutely no idea that despite the warm day she was moving slower than molasses in January.
Her younger sister, enthusiastic for the first fifteen minutes then alternately picking berries reluctantly or sitting in the dirt sulking because we weren't done yet, then standing up and dancing and singing.
Kindergarten gent, picking enthusiastically and trying his best to stick to the "Pick ten before you eat one" rule, then getting distracted and playing, then buckling down to pick so that his "team" (everyone but Mom) could win.
Middle gent putting one or two berries in the bucket, but mostly playing between the rows and eating strawberries.

Team Mom won the strawberry race, by the way. About ten minutes after fourteen-year-old lovely lady remarked at how fast she was picking, look, the bucket is almost 1/3 full, I was heading to get my second bucket. "Team Mom" picks in a way that expresses her personality, too: Task-oriented and efficient.


The gents and I spent the afternoon and evening making strawberry jam. My enthusiastic jam helpers stirred, licked the sugar spills off the counter, ate the extra strawberries so that we wouldn't have too many, and tasted the jam.

Dup! Dup! Dup!

There's nothing like the sound of jam jars sealing. When I hear that sound, I imagine that they're sealing in the summer, so that on a dreary winter morning when we're chilled and bleary, we can open a jar of strawberry jam and spread a bit of warm sweet summer on our toast or pancakes.
We had jam today. Waffles and strawberry jam. Perfect.

Saturday, June 09, 2007

Rainy Saturday Shortcake


You need:

A rainy morning
A strawberry field
A dear friend
Rubber boots and a raincoat
Boxes, buckets or bowls

On a beautiful sunny almost-summer day, plan an outing to the strawberry field with dear friend. Wake up to dreary gray skies. Load buckets, boots, and raincoat. Pick up dear friend and walk, bike or drive to the nearest strawberry field. By the time you reach the field the gloomy skies will begin to sprinkle on you, dear friend, the strawberry field, and everything else. Pick two flats of strawberries, give or take, with dear friend.


Dear friend and I discovered that picking berries in the rain is far better than picking berries in the blazing sun. We also discovered that picking strawberries at our age is far less easy than it was when we were kids. We went snap, crackle, pop! as we made our way up the row. But the rain was just a cooling sprinkle, the berries were perfect, and dear friend and I got a chance to talk with one another uninterrupted about our families, our faith, and homeschooling.

Later this afternoon I hulled strawberries and watched the rain. I hulled strawberries and watched out the window while loving husband, my brother-in-law, my nephews and a couple of my kids loaded up the junk that had accumulated behind the garden shed. (We postponed a planned barbeque, but went ahead with the junk removal.) I hulled strawberries and dreamed of shortcake. It takes a long time to hull so many strawberries. I had a sinkful of little greenish strawberry tops by the time I was finished. The best strawberry hulling tool I've ever used? My thumbnail. I've got a tomato corer/strawberry huller like this one, but I always fall back on my thumb because it's just plain faster.

I sent a bowl of strawberries with brother-in-law, and set aside a large bowl for shortcake, then froze the rest. A berry freezing tip, shared long ago by my sister: Spread the berries in a single layer on a very very lightly greased cookie sheet then set them in the freezer until they've hardened. Then put them in the freezer bags or containers. You get beautiful non-smushed frozen berries that don't stick together.


Perfect Strawberry Shortcake

The strawberries:

You need a big bowl of strawberries and some sugar. If you're a measuring kind of person, like loving husband, about eight cups of berries and 1/3 cup sugar. If you're an eyeball kind of person, like me, you need a large bowlful. Take a little less than half the berries (about three cups, for measurers) and mash them with a potato masher or a fork. Slice the rest, and mix the sliced berries and sugar with the mashed berries. Set aside.

The shortcake:

In a pinch, your favorite biscuit recipe with 2-3 times the sugar will do. Or try this one:

2 cups flour
4-5 tablespoons sugar
1 tablespoon baking powder
1/2 teaspoon salt
1 stick (8 tablespoons) butter, cut into pieces
1 egg
1/2 cup milk
A splash of cream or an egg white, and a little extra sugar

Preheat the oven to 425 degrees.

Mix the flour, sugar, baking powder and salt. Scatter the pieces of butter over the flour mixture. Use a pastry blender, a fork, or your fingers to cut the butter until it's in tiny pieces about the size of a pea. (You can use a food processor, but it seems to me to be more hassle to get it out, assemble it, and worst of all, clean it afterward. The pastry blender is easy to use once you get the hang of it, and it's easy to clean too.)

In a small bowl mix the egg and the milk, then gently stir them into the flour-butter mixture until the whole thing forms a sticky ball. Dump it out onto a floured counter, knead just a bit to get it to come together, then pat into a flat circle about 3/4" thick. Cut biscuit rounds and place them on a cookie sheet. (I use a small cup for this since I don't have a 2-1/2" cookie cutter. It works.) For sugary-topped biscuits, brush biscuits lightly with cream or egg white and sprinkle lightly with sugar. Bake in the oven for about 12-14 minutes. Leave them on the baking sheet to cool for about ten minutes.

The whipped cream:

For heaven's sake, use a spray whipped cream if it's handy. We hardly ever use whipped cream so we usually don't have it on hand. I get out the stand mixer, attach the wire attachment, pour whipping cream and sugar into the bowl and turn the thing on high. When it looks like whipped cream it's ready.

To assemble:

Slice the biscuit in half and place it in a bowl. Ladle strawberries over the biscuit and top with whipped cream.

It's worth kneeling in the dirt, in the rain, with crackly knees and greenish-red strawberry fingernails for this. Heavenly.

Monday, January 22, 2007

Artist Study: Mondrian (Part I)

Mondrian, Piet~ Composition A: Composition with Black, Red, Gray, Yellow, and Blue (1920)

Part I of our new art study, Piet Mondrian and his work. Mondrian was a Dutch painter with a very distinctive and recognizable style. It was difficult tracking down information about Mondrian, though at Kinderart (a great site for all kinds of art studies for preschool through high school) we found a Mondrian lesson plan which was the springboard for this study. Our best source for information about Mondrian and his art was The Annotated Mona Lisa, which explain succinctly and clearly about Mondrian and his art well enough for all of us to grasp the general principles. Mondrian noted that straight lines do not exist in nature, and set out to create an abstract representation of universal harmony and order. Vertical lines represent vitality; horizontal lines, tranquility; the angle created by the meeting of the lines create a balance between the two. Lovely lady and I had a sort of "Aha" when we read this. It made viewing the compositions more interesting, more than simple lines and shapes.

For me the main attraction of Mondrian from an art education perspective is that his art is different from some of the other art we've done so far, and it's easy to imitate. A fascinating aspect of Mondrian's art has been looking at his progression as an artist from this:

To this:


To this:


(In order, Red Tree, 1908; The Blooming Apple Tree, 1912; Composition with Red, Yellow and Blue, 1921) For a nice overview of Mondrian's development as an artist, try this site.

My favorite Mondrian:

Broadway Boogie-Woogie, 1942-43. It seems more dynamic and vibrant without those stern black lines holding everything so still.

Today we tried our hands at some Mondrian-inspired art. We plan to brush paint on canvas soon, but yesterday I got a flash of inspiration and decided to try something fun. A batch of sugar cookie dough, black shoestring licorice (which loving husband was kind enough to drive all over town to find), some cookie paint, and the neighbors to play along....Voila! Edible Mondrian!


Edible Mondrian

You need....

A double batch of your favorite sugar cookie dough. If you don't have a favorite recipe, try this one.

Black shoestring licorice (optional)

Light corn syrup

Red, blue, and yellow food coloring

Paper square for a cookie template

Cookie sheets, rolling pin, extra flour for rolling, spatula

Small containers for mixing the paints, clean scissors and paint brushes (and not the cheap-o brushes, either, unless you like bristles in your cookies)

Make the cookie dough. Before you roll out the dough, cut a paper square to the size you'd like your cookies. (Ours was 6"x6") You'll use the square for a template. Roll out the dough. When rolling, use just a bit more flour than you otherwise might so that the dough will be easy to handle. I found that it was easiest to take a piece the approximate size I wanted, finish rolling it on the cookie sheet, then use the template as a guide for trimming the shape into a square. Trying to transfer the large squares intact was nearly impossible. I also cut smaller squares, 3"x3", which were easy to pop onto the sheet using a spatula.

Use your clean scissors to cut the licorice into the desired lengths so that you can make horizontal and vertical lines on your cookie. Appreciate the dynamic balance at the intersections of the lines. (This is an art lesson after all.) Gently press the licorice into the cookie to help it stay in place. It may curl a bit while baking, but who cares? You're going to eat it, not hang it on the wall. (If you can't find shoestring licorice or can't abide it, you can use black cookie paint to create lines.)


Cookie paint: In your little containers mix some light corn syrup with several drops of the desired color. (No idea exactly how much corn syrup, we didn't measure. Maybe 1/3 cup? You'll have to use your common sense.) Make red, blue, and yellow cookie paint. To make black, mix a lot of blue, some red, and a few drops of yellow.

You'll have to let your cookies dry for at least 24 hours before you can eat them. That gives you time to admire them, and allows the paint to set so that you don't get all sticky when you eat your art.

Thursday, January 18, 2007

Speaking of chickens....

Chicken Pie

In Which We Make a Chicken Pie from Scratch


The night before:

You need....
A whole chicken
Onions
Celery
Carrots
Optional: Apples, white wine, peppercorns, whole cloves, salt

Pop a whole chicken in a large pot, including the neck but not including the guts that they always leave in the middle. I cut up the chicken, just so that it will fit, but it's not necessary. Throw in some carrots, a quartered onion or two (peel and all), celery stalks (the ends or those pale center pieces will do just fine), a bay leaf, a couple apples (also quartered) and about half a cup of white wine if you've got some handy. Add a little salt if desired. Put a few whole cloves, whole peppercorns, and a sprinkle of oregano and basil into a tea ball and drop that in too. Add water until everything in the pot is just covered. Bring the whole thing to a boil, then reduce the heat to bring it down to a nice simmer. After about 30-40 minutes of simmering, remove the chicken from the pot. Leave the neck in and leave the pot simmering on the stove. Let the chicken cool until you can handle it and pull the meat off the bones. (I'm always in a hurry, so I use tongs while it's still pretty hot.) Save the cooked meat in the fridge and toss the bones back in the pot. Let pot simmer on the stove for another hour or so, or until you've got time to put a strainer or sieve on a large bowl and strain the veggies and such out of the broth. Cover the bowl of broth and put it in the fridge until tomorrow. If you want fancy clear reduced chicken broth, strain the broth a few times through several layers of cheesecloth and boil it until it's reduced. I don't bother because the unfancy way looks kind of murky, but it only takes ten minutes to prepare, ten minutes to pull the meat off the bones, and a few miscellaneous minutes to strain it, put the broth in the fridge and clean up. It takes some cooking time, but for most of that time the broth is just simmering away while I do laundry or chat on the phone or watch mindless television.

The day you'll make the pie: The fat will have hardened at the top of the broth. Skim it off (I've found that a flat metal spatula works best) and save 2 1/2 to 3 cups of broth. Freeze the rest for later use.

If you really want to skip the whole broth step, you can use leftover chicken and canned chicken broth. Wimp.

Pie crust: Either the night before or sometime on the day you're making the pie, make your favorite double pie crust recipe. Pat it into rounds about 1/2 inch thick, wrap them in plastic wrap and put it in the fridge until you have time to make the pie.

Pie Filling:
This will give you enough filling for two pies. Just pop the extra filling in a freezer bag, and the next time you want a chicken pie all you've got to do is thaw the filling and make a pie crust.

You need....
4-5 red or yellow potatoes, peeled and diced
3 medium carrots, also peeled and diced
3-4 cups cooked chicken, chopped
1 package partially thawed frozen peas
6 tablespoons butter
1-2 small onions, chopped
2 garlic cloves, peeled and minced
3/4 cup flour
2 1/2-3 cups chicken broth
1/3 cup white wine
1/2 teaspoon thyme
1/4 teaspoon grated nutmeg (don't skip this, it makes the pie delicious!)
2 teaspoons salt
1/4 teaspoon black pepper

Bring a pot of salted water to a boil, add carrots and potatoes. Once the boil returns, blanch the potatoes and carrots for 2-3 minutes. Drain well. In a large bowl, toss the carrots and potatoes, peas, and diced chicken. Set aside.

Preheat the oven to 400 degrees.

Before the next step, I measure out my ingredients and set them in my cooking space so that I can just add things to the pot without having to stop and measure while I stir. It seems to work better that way. Melt the butter in a large saucepan. Add the onions and garlic and saute until softened. Stir in the flour. Keep stirring for a bit to toast the flour. Add the chicken broth, the white wine, and the spices. Bring it to a boil, stirring constantly, then lower the heat and simmer until it gets really thick. Pour it over the chicken and vegetables and toss.

Roll out the pie crust, and put the bottom crust in a pie plate. Pour in half the filling. (Set the rest of the filling aside and put it in the freezer once you've got the pie in the oven.) Put the top crust on the pie and make a fancy curly "C" on top for "Chicken." Or make your own initial to show your pride in your pie. If you can crimp the edges of the pie crust, go for it, make your pie beautiful. Place the pie plate on a cookie sheet, put it in the hot oven, and bake 45-55 minutes. Let the pie cool for at least one hour before serving.

It's perfect served with a simple salad.

This is the best chicken pie ever. It reads like a lot of work, but it's divided into shorter tasks that can be completed in those little interstices allowed by school, chauffeuring, and parenting. And the long cooling time makes this dinner perfect for, say, choir night, when I've got to make dinner then go pick up a kid then come home and serve dinner before I shuttle another kid off to a different activity.

Sunday, September 24, 2006

What's that squash?

It's a turban squash. Isn't it beautiful?


The fine young gents and I played "What's that squash?" in the garden yesterday. Remember when I posted about the mystery of the squash? Half the seeds I'd planted were eaten by some night critter, and I wasn't quite sure what was left. The turban squash was hiding in the lemon balm. Looks like an "assorted squash" came up. What a lovely surprise.


I was puttering in the garden yesterday, starting the fall garden cleanup. I accidentally broke a vine that had a pumpkin still attached, so I just picked the pumpkin to store in the garage.


"Look!" I said to the gents on my way to the garage. "A pumpkin from our garden!"


Two minutes later, while I was picking through the beans looking for dried pods...."Look, Mom! I found another pumpkin! Can we have a pie?" Fine young gent was as proud as, well, proud as pie that he'd found and picked a pumpkin for me.


*Sigh* "Thank you, sweetheart. Let's leave the rest to ripen, though."


I made pumpkin pie for my little guy.


How to get from pie pumpkin to pumpkin puree: Heat your oven to 400 degrees. Halve your pumpkin(s) and take out the seeds and slimy bits. Set the seeds aside for roasting later. Brush the cut edges of the pumpkin with a bit of oil and place on a rimmed baking sheet with the cut side down. Bake for about 40 minutes (for small pumpkins) to 1 hour (for larger). When done the flesh of the pumpkin should be soft when pierced with a fork, and the outer shell should be pulling away from the flesh. Let cool until you can handle it without burning yourself, then peel the shell off of the pumpkin. Puree the pumpkin flesh in the food processor.

Using your puree: You can serve the puree as is with a little butter and brown sugar, as though it's mashed/pureed squash (because it is). If you would like to use your puree in your favorite recipes for pie, scones (my favorite!) or pumpkin bread, let it sit to cool in the fridge for a few hours, or even overnight, if you can. Some of the liquid will separate from the puree, allowing you to skim it away so that your puree is just a bit thicker. (Note: I did not do this tonight and my pie is just fine. But still, it's a good idea.) I also cut back on the liquids in the recipe just a tad if I can to compensate for the fact that it's not that thick can-shaped glob of pumpkin I'd have gotten at the grocery store. (Oops! My pumpkin snobbery is showing! Don't blame me, I've been spoiled by my garden!)