 Part one of our mask art study, making the masks, here. If you haven't read it yet, the first mask-making post deals with actually making plaster masks.
Masks are a fascinating study in themselves. Making a mask is like creating an alternate identity, a fantasy you. I mentioned in the earlier mask post that making masks that were actually casts of their faces helped make the whole project more personal, and set the kids up for really taking a lot of time and effort to create their mask. The kids mouths tend to run a little more when their hands are occupied, so while painting masks we had interesting discussions about masks in general and about how and why the ladies and gents made their design choices. It was kind of neat getting a peek inside their little heads, especially seeing and listening to the completely different approaches each child took to the whole mask-making process.
I deliberately kept the design process open-ended so that the ladies and gents could give their imaginations free reign. We started by brainstorming with paper and colored pencils. I set a box of supplies on the table: feathers, beads, ribbon and string, sequins and glitter and buttons, so that the kids would know what was available. Lovely lady, 13, created a detailed mask sketch in color. Lovely lady, 11, chose some paint colors and gold beads and set them aside. I sat down with each of the gents and sketched their masks for them. The sketches gave us a jumping off point, at least.
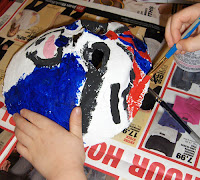
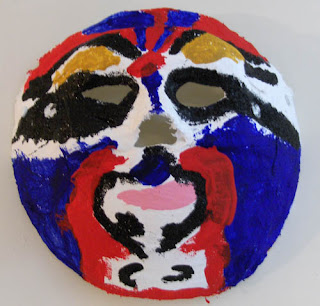
 As soon as we read about Chinese opera masks, fine young gent, 6, knew that he wanted to paint this mask:
The blue represents fierceness and some of the lines represent courage and skill. This young gent thrills to stories of pirate, knights in shining armor and fierce battles, so it's no surprise that his alter ego is a brave and courageous warrior. He followed the step-by-step directions we found on the internet to create his mask. It took a few painting sessions because each color had to dry before we could move on to the next step. Step-by-step directions for painting this mask here. For more information, the whole site is excellent: Chinese opera masks
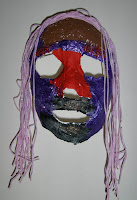
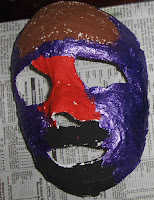 Lovely lady, 11. I expected a girly pink sequined feathery floofy thing. Instead, her mask is a man. With a beard and mustache, and brown skin except where he's purple. If you look closely, he's got red beaded eyebrows. The pink hair was an afterthought. She looked for a long time at all of the mask pictures on the bulletin board before beginning her mask, and it seems to be a combination of features from different masks that caught her eye and spur-of the moment impulse. The mask looks almost startling on the wall. I can't decide if I like it or not, but it certainly catches one's eye.
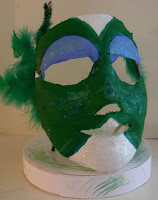
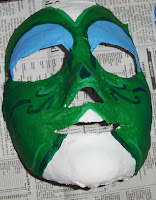 Lovely lady, the artist, 13.
Her mask is beautiful. She started with a clear vision and didn't waver. The mask is gorgeous, a classic fantasy mask. She could design and make fantasy masks for a living. This lovely lady's reason for this design: There weren't any green masks in the many photos we studied, and she wanted to create something unique.
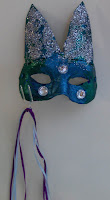 Fine young gent, almost 4. His design strategy consisted of saying, "Blue and green! I want blue and green!" After he'd obligingly scribbled on his mask picture with sparkly blue and green crayons, he reminded me that his favorite mask had horns. So I drew horns. Come mask time, I made him horns out of toilet paper tubes, helped him put them on the mask, and turned him loose with a paint brush. Once the paint was dry he decided he wanted to add more and more to his creation: glitter, "jewels" and a stick just like one of the fancy masks we'd seen in a picture. The jewels, ribbons and glitter were in the supply box, and loving husband swiped a plastic florist's stick (you know, the kind that holds the card in the flowers) from the grocery store. Voila! his mask is beautiful.
Wall-mounting the masks was a challenge. I even asked for advice at a frame shop, but the ladies working there had no idea. No helpful ideas, that is. "Punch a hole in it and hang it up with some string" wasn't exactly what I was looking for. Which is, oddly, why I said, "I don't want to poke holes in the masks to hang them if I can avoid it." I want to treat the kids' art as though it's real art, meant to be displayed, not just tacked to the fridge with a magnet until it falls down or gets in the way. Not all of it, but any project that's taken the time and effort and thoughtful imagination that the ladies and gents put into their masks deserves more than getting tied up with a piece of string. I did end up poking holes. I finally used some brass office fasteners painted to match the masks, punched a small hole through the side of each mask, twisted picture wire around the wings of the fastener, and hot-glued the wire to the fastener. Very secure, and you can barely see the fasteners on the outside of the mask.
Elder lovely lady's mask was even more difficult to mount. The feathers on the mask make it impossible to hang on the wall, and we couldn't get all of the Vaseline out of the inside of the mask (remember, we had to put Vaseline on the kids' faces to keep the plaster from sticking), so duct tape and glues wouldn't stick. The solution? A decorated styrofoam base, wooden dowels to prop up the mask, held in place by Sculpey clay.
Designing Masks
Supplies: Plaster, paper-mache, or plastic masks. Paint and brushes, glue (we used an all-purpose craft glue, and a hot glue gun), beads, buttons, sequins, yarn, plastic jewels, glitter, ribbon, feathers-- anything you can find in your craft supply box. Newspaper, cups for water, rags for cleaning. Picture wire, picture hangers or nails for the wall, brass office fasteners (if you want to try our hanging method).
Tips:
- If you've got a specific goal in mind, like making a realistic mask of the child's own face or creating a mask that reflects a particular culture or design element, make sure to be clear about your goals. Provide plenty of examples before you start your own design process.
- Start with a sketch on paper. We found that painting and decorating the masks was much easier when we had a general idea of where we were going. It also makes supply assembly easier if you already know what colors and materials you will start with.
- Particularly if the design project is open-ended, prime the pump by making a variety of materials available.
- Prepare a good-sized drying space. The masks are fairly large and will need a place to sit while drying and while waiting to be mounted. I used an old cookie sheet lined with newspaper, which was perfect for moving the masks without touching them.
- Allow plenty of time. It took my kids between 2-5 sessions, depending on the mask, as some paint colors needed to be applied separately. Glue needs time to dry. Decorations fall off the masks and need to be re-glued. Someone will decide that they want to add more or change the mask a little.
- Have fun! It's quite a project. So enjoy the process, too.
No comments:
Post a Comment